Streams, Pipes And Redirects In Linux (103.4 LPIC1)

streams, pipes, redirects text
5
(1)

Linux is an excellent system for manipulating text and in this post I’ll cover the Linux Professional Institute 1 (LPIC1 103.4) topic on how to use streams, pipes and redirects.


So what are streams, pipes and redirects?

When a linux command is created, it is usually created to do one job, and do that one job really good!

Some commands require some form of text input.

Sometimes we can manually type in some text for these commands, and other times we can send a command some text from inside a file. 

This is what we call ‘streaming’.


Linux also gets very powerful when we can “connect” commands together so we can perform actions that we want.


Some commands allow us to send the output of one command directly into another command. This allows us to automate out tasks, and this is what we call ‘piping’.

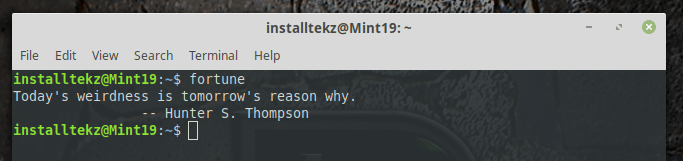
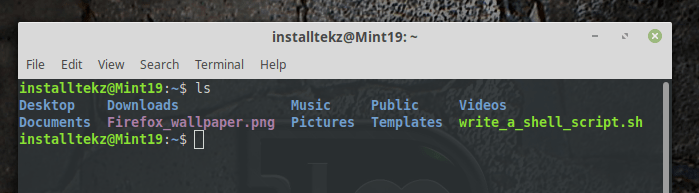
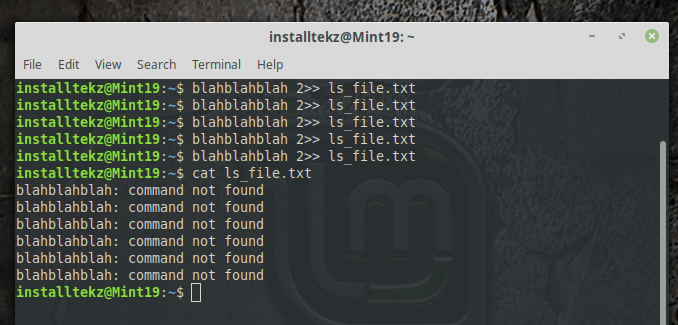
When we execute a command from the linux command line, the system will give us two kinds of output.

Firstly, it will output regular, ‘standard’ output from that particular command.

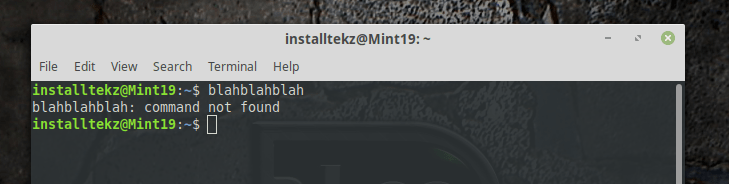
Secondly, if the system runs into a problem, it will output what we call an ‘error’.


By default then, the system will output these two results to the screen. 

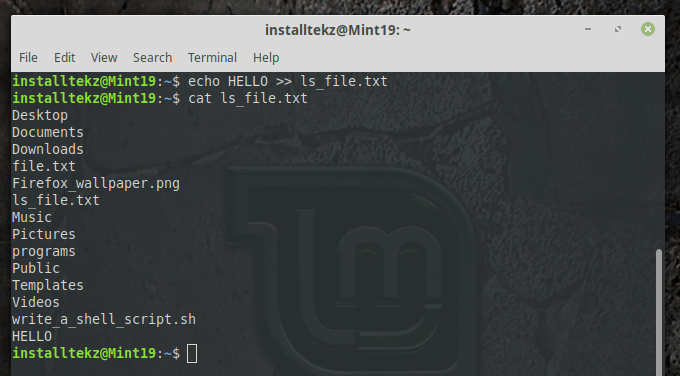
But we can send them separately to a file if we choose to do so.

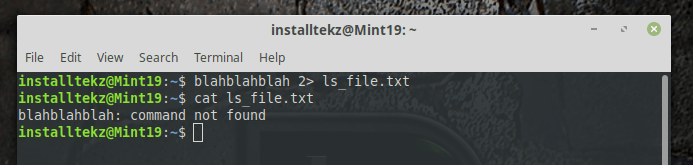
We could create an error log for example. This is what is known as ‘redirects’.


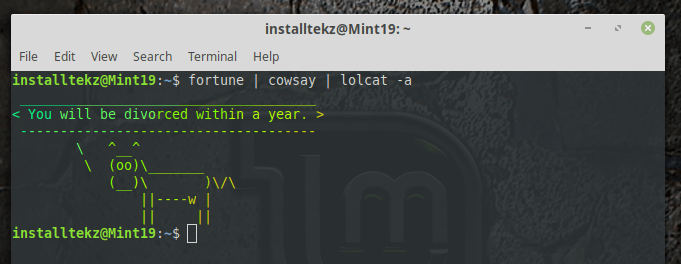
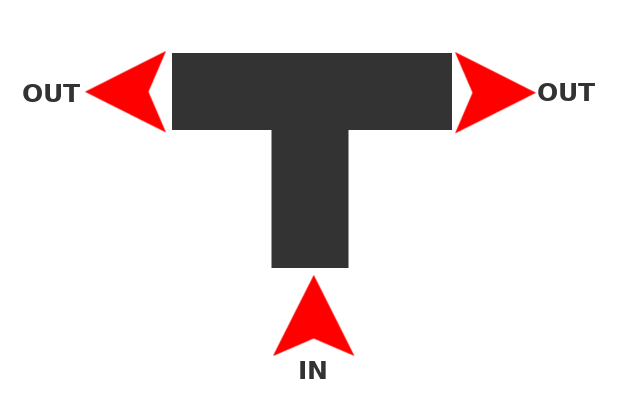
Let’s take a closer look at streams, pipes and redirects (standard input, standard output, standard error).


FREE Download: Linux Mint Tool Collection!


Install tons of great software from the Linux Mint repository with my personal tool list that I’ve built up over the years. I also keep this list updated from time-to-time.

For more information Click Here
linux mint tools pdf

Contents

1. Pipes

How Linux Uses The PIPE (|) Symbol

1.a Keyboard Layout

If you’re reading this and you’re in America then you can safely skip over this part..

The first thing I want to talk about with the pipe symbol (|) surprisingly, is where to find it on the keyboard!


So I’m from UK and I currently have a USA keyboard for my PC.

But I’ve learned now that whenever I purchase a new keyboard, I will always make sure I’m buying a UK layout keyboard.


The reason being that I want my keys to be consistent across keyboards. Maybe I have a mental condition, who knows.

The pipe symbol on a UK keyboard is located between the left-shift key and the ‘Z’ key which happens to be on the left side of the keyboard.

The USA keyboard layout usually has the ‘pipe’ key further over to the right side of the keyboard next to the ‘Enter’ key.

The reason why I bring this up is because I’ve had so many issues in the past with American keyboards.

If you’re like me and you have an American keyboard then you will need to go to your linux keyboard layout settings and configure the keyboard to use the American layout.


If you don’t do this then you will probably never find the pipe key!


Another way to check whether you have a UK keyboard is the number ‘3’ key will have the ‘£’ (GBP) symbol, American keyboards have a ‘#’ on the number ‘3’ key.

streams pipes and redirects - USA keyboard layout
USA Keyboard Layout
streams pipes and redirects - UK keyboard layout
UK Keyboard Layout

1b. Using Pipe (|)

Have you made it this far? I shall continue..

So where was I?.. oh yes, the pipe!


The pipe symbol is usually used by holding down the shift key and pressing the pipe/backslash key.

As I mentioned at the beginning of this post, pipes are used to “connect” two commands together.


OK lets have a little fun to test piping out! Run the following command in a debian-based linux distro (such as Ubuntu, Mint, Debian) to install some programs.

Make sure you have an internet connection of course.


sudo apt install fortune cowsay lolcat 

and enter the root password if you’re requested for it.


You may already have some/all of these commands installed but it’s worth running just to make sure.

Once these tools are installed and the command has completed successfully, try running the ‘fortune’ command:

fortune 

You will hopefully see something output like the following screenshot:

Now try running the ‘cowsay’ command:

cowsay some_text 

Here we need to give ‘cowsay’ a string of text for it to output. I used the string “moo”.

Now what we can do, is send the output from the ‘fortune’ command and pipe it into the ‘cowsay’ command:

We can again pipe further and send the cowsay output through the lolcat command:

fortune | cowsay | lolcat -a 

‘lolcat’ will give us some cool looking colors in our output.

If we use the ‘-a’ switch for lolcat we will get a cool looking animation too.

1c. How To Use The 'xargs' Command

Sometimes some commands don’t accept input by “piping” in data. But we CAN use ‘xargs’ instead.

Let’s take the command ‘echo’ for example. We can echo a string to the terminal by running a command such as:


echo "This is a string" 

Note: We need to use double quotes if our string has spaces in it.

The echo command works fine like this, but ‘echo’ does NOT allow data to be piped in to it from another command. Try it with the following example:

ls | echo 

As you can see, we get a blank line on the terminal.

So if we want to send data to echo then, we can use xargs. Here is the same example but with using xargs:

ls | xargs echo 

As we can see, the echo command now works!

This command works because the xargs program stores the output of ‘ls’, and uses it as arguments to execute the ‘echo’ program with.

2. Standard Input, Standard Output And Standard Error

2a. Standard Input (stdin)

When we type in our command on the terminal we sometimes need to give extra details or options, depending on what we want to do, and depending on what a particular program needs.


We call this ‘Standard Input’ or ‘stdin’ when we manually type in the commands on the command line.

When we’re not redirecting anything in to a particular program from another program then we are using standard input.


Sometimes we can send (stream) text into our command rather than typing it out.

To do this we use the left-angle bracket (<) followed by the filename that holds the text that we want to use.


In this case then, the command is still getting some input, but rather than getting it from a human typing on the keyboard, it’s getting the info from a file.

Please note that NOT all commands work the same way, and so not all commands will accept this kind of input.

2b. Standard Output (stdout)

The ‘Standard Output’ or ‘stdout’ is when a program displays it’s normal output to the screen.

This standard, regular output is used by default and the output is not being redirected anywhere.

The below screenshot shows the ‘ls’ command being executed, with it’s ‘standard output’ displayed on to the terminal:

As we can see from the image above, when linux completes a command successfully, by default it displays the successful output to the terminal.

2c. Standard Error (stderr)

By default, ‘Standard Error’ (stderr) ALSO sends IT’S output directly to the console output, just like standard output does.


If I type a random string of characters into the terminal then the system will not find a matching command in it’s PATH (I go over the ‘PATH’ in “How To Work On The Command Line” post).


As we can see from the screenshot below, the system throws the error directly to the console for me to see.

The error being “Command not found”:

3. REDIRECT Standard In, Standard Out And Standard Error

3a. Redirecting Standard Output

We seen that when we execute a command on the command line that by default we get the output from the command to display on the console.

But what if we want to store the result in a file, instead of just displaying it to the screen?


Sometimes we want to do this because we can use the resulting data for another program.


If we want to redirect the output to a file, we use the right-angle bracket (>) then a name of a file. Now, if the file exists, it WILL be overwritten.

So make sure that’s okay with you before running the command.

We can also APPEND the output to the file with the double right-angle brackets (>>).

Using ‘>>’ will NOT overwrite the file if it exists, but it will append the output of the command to the bottom of the text file that you specify.


Below is a screenshot of using the ‘ls’ command and redirecting the resulting output to a file. I then use the ‘cat’ command to show you the contents of the file:

The ‘ls’ command simply displays what files and folders exist in the current working directory. As we can see, the output of ‘ls’ was placed into a file called ‘ls_file.txt’. 

Now let’s try appending some data to our ‘ls_file.txt’ with the double right angle brackets (>>).


As you can see from the screenshot below, I use the ‘echo’ command to display the text “HELLO”.

But instead of displaying the text to the screen, I append this text to the file.


Now, when I run the ‘cat’ command again to display the contents of the file, I see HELLO at the bottom of the file.

We sometimes use a number 1 for Standard Output. In this case then, we can also use the following command:

ls 1> ls_file.txt 

And the following command will perform the same action as above (because no errors should exist):

ls > ls_file.txt 

3b. Redirecting Standard Errors

A number 2 can be used for Standard Error.


In a previous example I typed ‘blahblahblah’ on to the command line and I received the standard error on the console.

But we can also redirect the standard error too.


The screenshot below shows me redirecting the standard error with ‘2>’ and then displaying the contents of the file with the ‘cat’ command:

Notive how after I ran the command: “blahblahblah 2> ls_file.txt” there was no error that returned to the screen?


It’s only when I take a look at the contents of the file ‘ls_file.txt’ can I then see the error, which is now a line of text in the text file. 

3c. Appending To A File

We can always use the double right angle brackets to APPEND to the file, rather than overwrite it.

If the file does not exist then it will simply be created.


The following screenshot shows me running the same command over and over, but instead I am APPENDING the errors to the file.

Again, I use the ‘cat’ command to display the contents of the file:

We can also redirect BOTH standard output AND standard error to a file in one command. We can send both outputs to the same file, or to two separate files.

The following command is an example of sending both standard output and standard error to separate files:

ls blahblahblah >> results.txt 2>> errors.txt 

The following command is an example of sending BOTH standard output AND standard error to the SAME file:

ls blahblahblah >> results_with_errors.txt 2>> results_with_errors.txt 

3d. Redirecting Standard Errors To Standard Output

Now let’s redirect the standard error… to standard output! We tell the bash interpreter to do this by using: 2>&1


The following command will redirect the standard output to a file called ‘file.txt’, it will also redirect standard error to standard output.


Now, all standard output AND standard error will be redirected to the file called ‘file.txt’:

blahblahblah > file.txt 2>&1 

In the above command, there will only be errors shown in the resulting file. This is because there was no successful output to begin with.

3e. How To Use The 'tee' Command

What if we want to display the output of a program on the terminal AND store (redirect) the output to a file.. both at the same time?!

For this we use the ‘tee’ tool.

Take the following command as an example:

ls | tee ls_result.txt 

As we can see, the ‘ls’ command output is displayed on the console like it would when it’s ran on it’s own, but it has also sent the output to the file called ‘ls_result.txt’ as if we had used the right angle bracket (>).


we can of course view the contents of the file with the following command:

cat ls_result.txt 

and we should see the output of the ls command in this file too.

Conclusion

Hopefully by now you have a good understanding of linux streams, pipes and redirects.

You may not fully understand everything here all in your first sitting but keep going through this post until everything sinks in.


Don’t forget to practice for yourself on a linux terminal either as it all becomes clear eventually.

I believe that this is a very important part of linux and you will surely up your game on the terminal once you understand what is happening here.

Resources:
A helpful resource can be found Here for a Question and Answer guide to help you pass the LPIC-1 certification!

installtekz icon

Quote Of The Day

installtekz

"When wireless is perfectly applied, the whole earth will be converted into a huge brain..." - Nikola Tesla, 1926

How useful was this post?

Click on a star to rate it!

Average rating 5 / 5. Vote count: 1

No votes so far! Be the first to rate this post.