Top 5 Raspberry Pi Home Automation/IOT Project Uses

raspberry pi cloud
0
(0)

Are you thinking about creating an IOT project with a Raspberry Pi?

In this post I will take you through some common reasons of why we would want or need to use a Raspberry Pi when creating an “Internet Of Things” system.

Contents

5. Web Server

We could setup many different services with a Raspberry Pi (just like any other computer) but serving a web page or pages can give us an easy way to manage the system and view data such as charts.

We don’t need a TV or monitor connected to the Pi for us to interact with the web page though, as I will explain further down this post in the “Remote monitor & control” section below.

web server

4. GPIO (General Purpose Input/Output)

The GPIO header pins located on the Raspberry Pi can be seen in the image below as black plastic connectors with conductive pins.

We can connect electronic components to these GPIO pins such as sensors for detecting light, sound and even water moisture, for example.

We can then gather data from these sensors and create a log or a database if we wanted to. 

GPIO pins

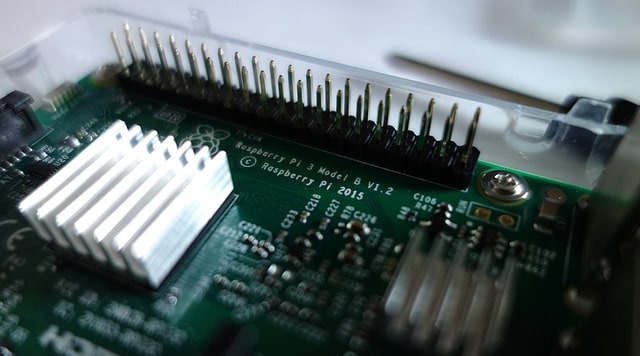
Other than electronic sensors then we can also connect output components such as motors and lights.

We can use programs or applications on the Raspberry Pi to switch on and off these electronic components. This program could be the web page that I explained in the section above.

In this case then, we would be manually intervening with the functionality.

This is great if that’s what we are trying to achieve, but what if we wanted to control these motors, lights and other components automatically?

Well we could use the data that we collected from the sensors, along with a program that will use this data to then drive the output components.

Let me give you an example:

Watering A Plant

If we wanted to water a plant automatically when the soil becomes too dry, we can use a moisture sensor to collect the dryness data from the soil.

We can then create a program that will monitor this data, and when the soil becomes too dry, we can then activate a water pump that will then in turn, water the plant!

plant

We can mix and match any input sensor components with any output components that we choose.. imagine all the possibilities that now open up to us here.

3. Data Storage

Somewhere in our IOT system we’re going to need to store some files eventually.

Because the Raspberry Pi has a “fully-fledged” operating system and the ability to use flash memory via USB and micro SD card, it seems to be the perfect device in our network for data storage. 

file storage

Other than just storing data in files we can very easily setup a database within the Raspberry Pi too.

The most common and obvious database of choice would be Mysql.

If we’re collecting data from sensors every 5 minutes for example, this data will soon build up and we would probably need to keep this data in a way that we can easily manage and eventually create charts from if we need to.


2. Scheduling Tasks

We can setup our Raspberry Pi to perform many different tasks throughout the day.

We can create schedules in the computer using a variety of options, for example:

We can trigger a feature on any day of the week, and at any time of day. We could schedule for the first Monday of the month, and maybe we want to activate something four times per day.


The most common way to perform these scheduling tasks would be to use cron jobs, although many ways are possible.

scheduling

Automation within an IOT system is what truly makes it unique.

Crossing over the digital world with the real world. Who want’s to sit around and wait to press a button right?

We can now setup automated systems and forget about it.

1. Remote Monitor & Control

Our IOT system doesn’t need to be in the same room as us if we need to monitor any data or send control signals.

In fact, we don’t need to be in the same country! We can control our devices over the internet very easily and a Raspberry Pi is an excellent device for us to do this.. it is a computer after all.

It’s very possible to use the web server that I mentioned earlier in this post to do just that, but this is just one example of how we can easily control our Raspberry Pi remotely.

remote control

Conclusion

There you have it! These are just the top implementations that I can think of on where a Raspberry Pi could be utilised in an IOT system.

Can you think of an IOT project that would incorporate one or more of these features?

I hope this post has been helpful towards you on making a decision as to where you can use your Raspberry Pi in an “Internet Of Things” system.

If you would like more information on what other resources you could use to extend your project then why not take a look at ‘How To Build An IOT System‘.

FREE Download: CIoTP Checklist!


The ‘Certified Internet of Things Practitioner’ Certification provided by CertNexus is an excellent blueprint to begin learning IoT.

To download your CIoTP PDF CheckList file Click Here
CIoTP checklist
installtekz icon

Quote Of The Day

installtekz

"When wireless is perfectly applied, the whole earth will be converted into a huge brain..." - Nikola Tesla, 1926

How useful was this post?

Click on a star to rate it!

Average rating 0 / 5. Vote count: 0

No votes so far! Be the first to rate this post.

Leave a Reply

Your email address will not be published.