13 ULTIMATE RetroPie Tips And Tricks For Beginner’s

Retropie tips and tricks guide
5
(2)

Welcome to my ULTIMATE RetroPie tips and tricks guide!


This is an in-depth RetroPie guide to help you fix some issues that you may be experiencing or if you’re thinking about starting this cool project.


Many posts on the internet describe how to setup a RetroPie on a Raspberry Pi but I notice that most of them take you through the most obvious and generic steps.


In this post I’ll cover in more detail some issues that you don’t normally see in a typical RetroPie guide.

The above images show my very first RetroPie kit that I had for sale in my local area.

I aimed for using top quality and brand new hardware to give the customer a great experience.


Who wants old and warn out parts, right?!


As well as taking you through the software setup I will also cover the hardware that I decided to purchase and why I chose to purchase it.

The above images show screenshots of my final setup.

This is the front-end known as Emulation Station.

Of course, yours may look very different to mine and this would depend on what theme you choose to apply and what emulators you choose to install.

Contents

1. Hardware Tips & Tricks

How Much Does A RetroPie Cost To Build?

Usually when you see someone building a RetroPie on the internet you will hear about how cheap it is to get started.


Although this is the case in general, I decided that I needed to show the Pie a little more love and create a slightly better quality product.

Of course I was also aiming for a reasonable profit margin too.


In total then my build cost me around £80 GBP ($97 USD) and so it’s certainly not the most expensive RetroPie out in the wild.


RetroPie Tips & Tricks

What Raspberry Pi Do I Need For A RetroPie?

My Raspberry Pi model of choice was the 3B.

I could have used the 3B+ model but it seemed to me that the 3B was more readily available on Amazon and Ebay that’s close to where I live, here in UK.

Also the extra features included with the 3B+ compared to the 3B just wasn’t needed for this build.

It has Gigabit Ethernet (in which I wouldn’t be using) but a slightly faster CPU cores which I guess couldn’t hurt to have.

Raspberry Pi 4 prices at this time just didn’t seem to be worth it for this build and may be a little over-kill.

Although some emulators could well work a lot better on a Pi 4.

Ultimately, the choice is yours.

Below I have supplied links to various Raspberry Pi models for you to price compare:

RetroPie Tips & Tricks

What Case Do I Use For RetroPie & Where To Purchase Vinyl Stickers/Decals

By purchasing the official Raspberry Pi case you can be sure that you’re getting a good quality product.

The case looks and feels great and for less than $10 its ideal for the task in hand.

Depending on what version of Raspberry Pi board you have, you will need to purchase a case that supports it.

If you have a Raspberry Pi 3 then be sure to check the item description to see if the case supports the RPi3 for example.

Although this case is very plain and boring.. so I decided to pimp out the case with some vinyl decals that just screams “RetroPie” 🙂

And so I purchased my vinyl decals from PimpMyPiCase on Ebay.

Decals
Official Case with Decals Applied

What Cables Do I Need For RetroPie?

For a RetroPie you will need a:

  • HDMI cable
  • Power cable
HDMI Cable
 

There’s a lot of cheap cables on the internet available to buy but I wouldn’t recommend you cheap-out on these.

Remember.. buy it nice or buy it twice!

The HDMI cable I chose was a gold plated and braided 1 meter cable.

However after purchasing this cable I wish that I had gone for the 2 metre cable now as it sometimes feel too short when hooked up to the TV and it doesn’t leave much room to work with.

It’s not always easy to obtain these cables from the same brand but any high-quality HDMI cable should be fine.
HDMI Cable
USB Power Cable
 

The USB power cable with plug for me HAD to have a power switch on it.

I still don’t know why the Raspberry Pi doesn’t have a power button but this cable fixes that problem!


Again, the cable seemed a little short at 1 meter but I couldn’t find any other cable lengths for sale on Amazon or Ebay.


The image below shows a UK mains Raspberry Pi power cable complete with rocker switch and plug adaptor: 

UK Power Adapter

Depending on your country and whether you have a Pi 3 or Pi 4 will determine what power adapter you will need.

 The following links will take you to Amazon for UK and USA adapters:

What Memory Do I Need For RetroPie?

You will need a:

  • Micro SD Card
  • USB Flash Drive/Thumb Drive (optional)
Micro SD Card

Because I would be storing my game ROM’s separately on a USB drive, I didn’t need a huge capacity SD card.

For me it had to be a Kingston. I believe that it’s one of the best manufacturers out on the market today for these types of memory storage.

For less than $7 I went with the 32GB micro SD card.

The total amount of memory that I used in my SD card was approx. 7GB.

This stored the:

  • Linux operating system
  • Emulators
  • Other tools
  • Approx. 8,000 box art game covers
 
Micro SD Card
USB Flash Drive

The Sandisk Cruzer Blade 128GB USB drive was my choice for storing game ROM’s.

Another great manufacturer in the market today for making top quality memory devices.

This cost me around $15 but the price seems to increase each time I buy one of these devices.

I guess there’s a lot of demand for these USB drives.

The Sandisk Cruzer Blade 128GB drive can be found on Amazon.com here

USB Flash Drive

Reasons to store game ROM’s on separate USB drive

Of course you can always get a higher capacity micro SD card and store your game ROM’s on that.


To me though this seems like a shortcut that I wasn’t willing to take.

There are many benefits to running your game ROM’s on a separate USB drive.

Micro SD Card Reader

Nothing special about this device although I’ve bought some cheap and nasty USB SD card readers in the past.

The one I settled for was good quality and I never had any problems with it.

My advice in purchasing a USB SD card reader is to not get the cheapest you possibly can.

The quality of these very cheap readers are usually very poor and for an extra $1 it’s possible to get a reader that will work well and last for years.

Here is a link to a USB card reader on Amazon.com with a high rating

What Controllers/Game Pads Work Well With RetroPie?

We all know that when it comes to great quality games console controllers we look at the top manufacturers such as Sony and Microsoft to set the quality baseline.


But with generic PC/USB controllers this standard doesn’t exist.

It’s very easy to get hold of some cheap controllers and the quality usually reflects the price.


Even the not-so-cheap controllers are not usually great quality in some cases.


After buying many controllers to find the make and model that I thought would complement the quality of the RetroPie, I will share with you what I found to work best for me.


In my opinion then GioTeck.com make an excellent quality controller. After trying the VX1, VX2 and the VX3, I would have to recommend the VX2 the most.


It just feels great, everything is where it should be and it has a cool design.

VX1 Controller
GioTeck VX1
VX2 Controller
GioTeck VX2
VX3 Controller
GioTeck VX3

From these controllers then I would have to recommend the VX3 the least as I feel that GioTeck let the ‘cheapness’ creep in a little here.

The plastic and other materials don’t have that same quality feeling to it.

However, the VX3’s were easier for me to get a hold of and in brand new condition and so for that reason I decided to go with the VX3’s for now.

All of these controllers ship in either a wired or wireless model and I can only give my opinion on the wired controllers as I haven’t tried any wireless controllers from GioTeck as of yet.

The following links will take you to the Amazon page for UK and USA.

Please note that these GioTeck controllers seem to be supplied in UK and may need to be purchased as imports from USA.

However I have also heard good things about these controllers from American YouTubers:

RetroPie tips & tricks

CAUTION: Beware Of Buying ‘Shanwan’ Fake Control Pads

I was first introduced to these Shanwan fake controllers as I started to build my Pie.

These things are EVERYWHERE and plague the internet.


The problem is that these controllers are REALLY good fakes!

My first experience with Shanwan was with a PS3 wireless controller.


It shipped in a Sony box and with instructions so I had no clue as to knowing it was a fake when it first arrived. 


In fact, the GioTeck VX3 Controllers that I decided to go with were also Shanwan fakes which I ordered from Ebay but I believed them to be genuine when I first purchased them.

shanwan fake controllers

After paying for the items I then went ahead and messaged the seller.


I simply stated that if these controllers were Shanwan fakes or not brand new then could they please cancel my order as I would only need to return them.


I don’t usually reach out to Ebay sellers (or anyone else for that matter!) with this kind of message but I had been sent so many fakes at this point it just wasn’t funny.


They responded back in a short period of time and assured me that these controllers were genuine and that they only receive items from trusted UK suppliers.


Well I took the sellers word for it as he/she seemed genuine enough to me.


 But these were in-fact Shanwan fakes when they arrived!!


I guess that with internet shopping taking over from the ‘bricks-and-mortar’ stores there’s just no where to go to avoid this kind of thing happening these days.

RetroPie tips & tricks

2. Operating System Tips & Tricks

There are usually two choices available when selecting your Operating System of choice for creating a RetroPie.

These are:

  • Raspbian
  • NOOBS
 

Many newbies would like to go the NOOBS route.


I HIGHLY suggest you don’t go this route and you take the Raspbian OS approach.

Later down this post I talk about a tool called PiShrink which is needed to create duplicate SD cards.


PiShrink doesn’t work with a NOOBS install as it has a very different partition structure to that of Raspian.

At the time of writing, NOOBS isn’t supported by PiShrink but that could change in the future of course.

3. How To Flash RetroPie '.img' Image File

The “internet standard” for getting your RetroPie Operating System on your SD Card seems to be the balena etcher tool and I so I would recommend using this to get yourself setup. 


I would only use this for the very first install as I would recommend the dd command in linux to create the backup, then the PiShrink tool for shrinking the image, then dd tool again for writing the shrunken image back to SD card while making regular backups in which I explain below.

Balena Etcher
Balena Etcher Flash Tool

Balena Etcher is available for Windows, MacOS and Linux and so makes a great common ground no matter which of these three systems you prefer.


Once you’ve grabbed yourself a copy of Balena Etcher then make your way over to RetroPie.org.uk and get a pre-made RetroPie image for your particular Raspberry Pi.

4. Get into routine with PiShrink and regular backups!

The ABSOLUTE KEY.. to selling your very own RetroPie images, comes down to this one thing! Can I make copies of my SD card image?


If you can’t make a 1 for 1 copy of the SD card image that you’ve put your blood, sweat and tears into, then how are you going to sell RetroPies?


It’s obviously not feasible to spend months on an image, to then have to start all over from the beginning on the next image.

This is where PiShrink comes to the rescue! PiShrink can be found over on Github here.


If it wasn’t for this excellent linux tool then my RetroPie for sale wouldn’t exist and so a HUGE thanks goes to the developer of PiShrink.

create retropie backup

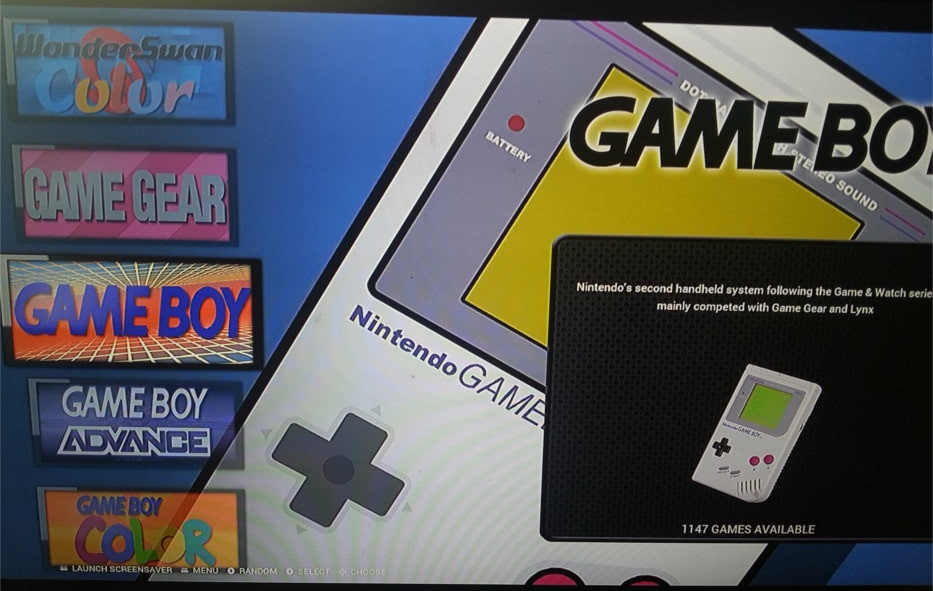
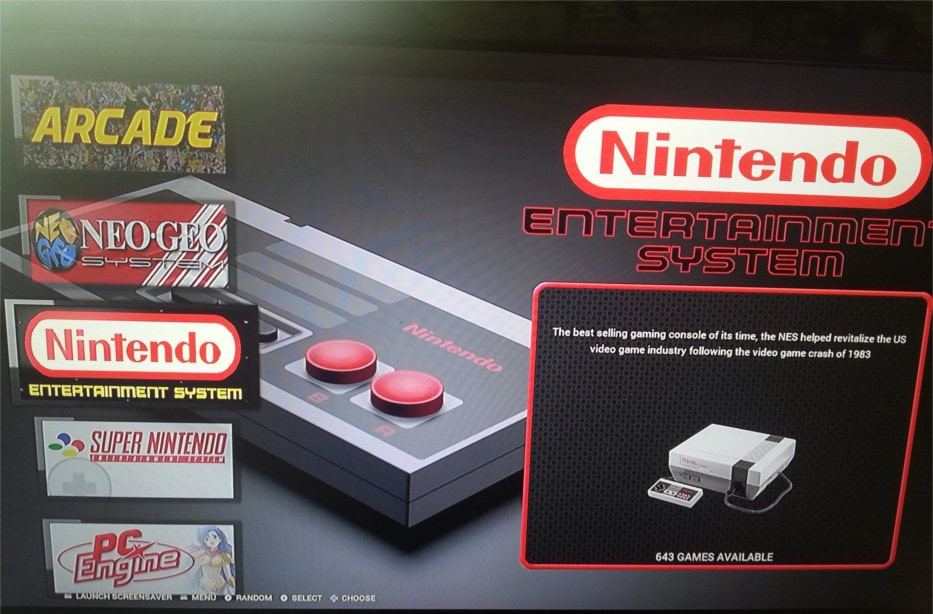
The Problem With SD Card Capacity When Cloning Cards

What most people don’t realise is that two seemingly identical SD cards do not hold the exact amount of data.

So if you create a dump of your image from one SD card, it may not fit on to another similar SD card.


Even though they both state they are 32GB etc, these two cards are not exactly identical to the bit!

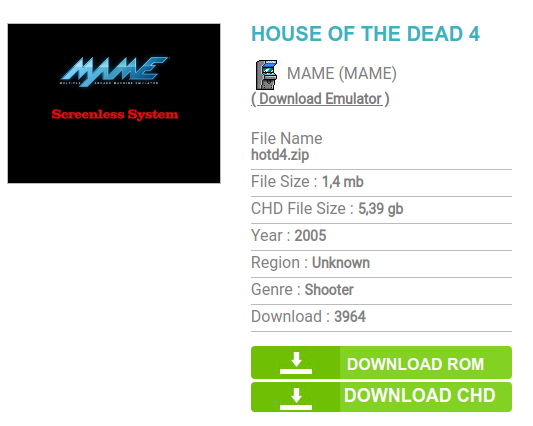
After creating a dump of your image, we then run the PiShrink tool on the image file.


PiShrink compresses the image down to around 7GB but this all depends on what data you have on your image of course.

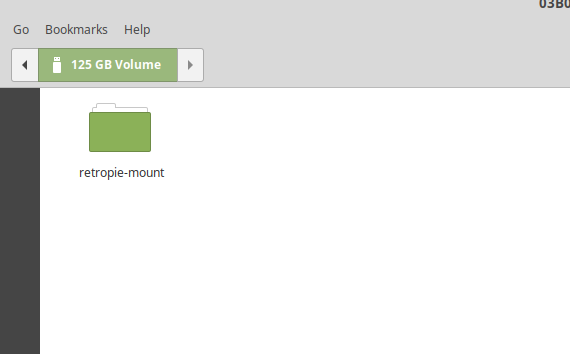
We then write our newly created, compressed image file to another micro SD card.


Now, when we place that new SD card into the Raspberry Pi and boot up, linux will expand the file system to the full size of the SD card.

This usually happens within around 10-15 seconds of booting up for the very first time, and then the system will reboot.

RetroPie tips & tricks

Do I Need To Make Routine Backups (dumps)?

Yes.. you most certainly do.
 

Every once in a while you will need to create an SD card dump of your image during the process of building.

I usually done this at the end of the day after working on the project.

I strongly feel that this is very important task and shouldn’t be overlooked.


There have been MANY times that I messed up my image, and if I didn’t have backups then I would be loosing days, weeks or even months of hard work! We don’t want that to happen.


If you create a backup every night then the worst case scenario is that you would loose one days work, max.

How To Create A Backup Using ‘pishrink’ & ‘dd’ In Linux

PiShrink is only available for linux (at the time of writing) and so here I will take you through the steps that are needed to perform SD card backups.


If there are files on the memory card then some pop-up windows may appear. Just close these windows.
 
We need to unmount any partitions that auto-mounted. If there are no partitions/files on the memory card then this may not need to be done but it’s worth doing anyway.
 
We cannot successfully read/write our SD card if partitions from it are mounted.
Open a linux terminal and enter:
sudo umount /dev/sdb1 

and enter your root password if/when prompted.


Next we need to dump the contents of the SD card with the following command:
sudo dd if=/dev/sdb of=retropie.img bs=4M 

This will create a binary image file of your SD card.

This is known as a dump. This process may take sometime. For me it takes around 40 minutes.


Once we have our full SD card dump we now need to shrink the image file so it will fit on any other SD card with similar memory capacity.


Head on over to Github and grab PiShrink and install it by following the instructions from the author.


Now we will use PiShrink to shrink our image file with the following command:

sudo pishrink.sh retropie.img shrunk.img 

This firstly creates a copy of the image file, then shrinks the copy.


I believe it’s always a good idea to keep your original backup but if you’re running out of disk space on your PC/laptop then you can always in-place shrink the file with the following command:

sudo pishrink retropie.img 
pishrink output
pishrink.sh at work

How Do I Write The Shrunk Image File To SD Card?

Now that we have our shrunken image file we can create a clone of the original SD card to another SD card.


Remove the USB card reader and remove the SD card from the reader. Now plug in another SD card in to the reader and then plug in the reader to a USB socket on your PC/laptop.

We will need to close any windows that may pop-up, and run the commands to un-mount partitions 1 and 2 again.

sudo dd of=/dev/sdb if=shrunk.img bs=4M 
This shouldn’t take as long to write as it will only be around 7GB or so. Wait for the process to complete.
 
Once complete we simply place the SD card into the Raspberry Pi and boot it up. Wait 10-15 seconds for it to expand the file system and it should reboot automatically.
 
Job Done!
We now have a cloned SD card image.
RetroPie tips & tricks

5. Software Setup Tips & Tricks

Prepare The USB Flash Drive

CAUTION: retropie vs retropie-mount

This is a HUGE pitfall that you need to be aware of as I fell for this one the first time around.

After we have our RetroPie Operating System up and running we now need to create the file structure on our USB drive.


Once booted up in RetroPie, insert the USB drive into a spare USB socket in the Raspberry Pi. Wait a minute or so, then shut down the Pi.

Insert the USB device into your PC/laptop.


You will notice that a directory and file structure has been created for you by RetroPie.

This is where you will need to place your BIOS ROM files, game ROM files and more.

retropie mount directory
RetroPie mount's this directory
RetroPie coppies files to SD Card!

In the root of your USB drive you will notice that the first directory is called “retropie”.

If you place all of your files under this name, then when you boot up your Pie with the USB drive plugged in, RetroPie will COPY EVERYTHING over to the SD card!!

Now, If you have a 128GB USB drive filled with ROM files and only a 32GB micro SD card, then things get very messy very quickly!


As the linux operating system memory will get maxed out, linux will become unusable, and you will need to re-flash your backup dump to the SD card.

This is why we need to create backups!


What we need to do is rename the folder from “retropie” to “retropie-mount”. Now when we boot up RetroPie, our USB drive will be mounted into the linux file system and NOT copied over.. pheww. 

RetroPie tips & tricks

6. Acquiring game ROMs and BIOS ROM files

This part of the whole setup is a little shakey with regards to the law and most importantly, are you breaking it in your country?


You will need to do your research within your country as to whether acquiring game ROM’s and system BIOS ROM’s are legal but from what I gather, this is what is allowed/not allowed:

You are allowed ONE backup copy of a game ROM or system ROM.. if you already own it!


Let’s say you have a Nintendo 64 game cartridge of Goldeneye (a classic of course!) and you have a game ROM dump file of that particular game.


The backup file would be perfectly legal in this instance.

But, if your game cartridge was shattered in to a million pieces, you will need to keep all of those broken pieces for the backup file to stay legal.


As with the system BIOS, I’m guessing this is the same. You will need to hold a genuine console in your possession for the BIOS ROM to stay legal.

copy ROMs

Downloading BIOS ROM Files

You will need to use your favourite search engine to find the BIOS files you need.
All I will say here is that I would most certainly check the md5sum of the file once you have downloaded it and compare it to the md5sum from RetroPie Wiki for that particular system BIOS file.


To check the md5sum on the wiki page, go to RetroPie Wiki, and on the right-hand side select your gaming console system, under ‘Emulators’.

Scroll down and find the BIOS section and if there’s an ‘md5’ number listed, then this is what your downloaded file needs to match.


Note that not all systems need a BIOS file added.

To check the md5 of a file in linux, use the command:

md5sum name_of_file_here.bin 

where name_of_file_here.bin would be your BIOS file name. Then we just match the number with the number from the wiki page.

md5sum is usually already installed in your linux system.

RetroPie Tips & Tricks

7. MAME and Arcade ROMS Tips & Tricks

What Is MAME & Why Is The RetroPie Version Old?

MAME (Multiple Arcade Machine Emulator) is a software emulation tool that emulates many arcade machines and can run on Windows and Linux.
 

MAME is in constant development and is improving over time.


However, as newer versions of the software are released, it require’s newer, and more powerful hardware to run the game ROM’s.


There are many problems with running MAME on a Raspberry Pi.


Firstly, MAME2003 has been chosen as the optimal version to work on this single board computer.


But even this doesn’t stop many of the game ROM’s from working correctly, or not at all.

MAME logo

The unique thing about MAME is that each version has been created for a specific set of game ROM’s.

All of these ROM’s need to be together in what is called a ROM set.


You will require the correct, specific ROM set for the specific version of MAME you are wanting to run.

MAME2003 has around 4007 ROM’s in it’s ROM set.


After testing around 100 of these ROM’s on the RetroPie I found that over half of them did not work.

I wasn’t willing to have such a huge collection of games where only but a few would work.

RetroPie Tips & Tricks

What Are ‘CHD’ Files For MAME?

Many retro arcade machines had their game ROM’s stored in ROM chips (integrated circuits).

This was fine for most games at the time as these game ROM’s didn’t require much memory.


However, some of the bigger games with bigger budgets had hard drives in the arcade machine.

This allowed for more memory to be stored.

They usually had the games startup files stored in the ROM chips and the bulk of the games memory would then be ran from the hard drive.


Sometimes when we download an arcade ROM and see that the file is very small, only a few kilobytes for example, but this could possibly be the startup files only.
Therefore this ROM will fail to load on it’s own if you attempt to execute it in an emulator such as MAME.
 
A good example of this is the game: House Of The Dead 4. Here is a screenshot taken from the site: wowroms.com where the download page shows the ROM AND the CHD file to download.

Notice how the CHD file is over 5GB in size, yet “File Size” states 1.4MB (This is referring to the game ROM which holds the startup files).

You will need BOTH of these files for the game to run.


Please note that ‘House Of The Dead 4’ is used as an example only & unlikely to work on the raspberry pi.

Parent And Child ROM’s

With all of the emulators in RetroPie it’s possible to run game ROM’s as individual files and these will run just fine.

However, Arcade game ROM’s may be a different case all together.

Some Arcade games work perfectly fine on their own. But some game ROM’s require other game ROM’s to work.

These are known as Parent and Child ROM’s.

Choosing Alternate Emulators

Sometimes the default emulator for arcade games don’t work.
I found this to be the case for around 50% of my Neo Geo ROM’s.


If the game fails to start then it’s a good idea to try another emulator.

To try another emulator all you have to do is press the correct button on the controller when the game is loading up, right after you selected it.


For me, it’s the circle button on the PS3 controller.


I would continuously press this button and when the new screen appears I can select an alternate emulator for that particular game ROM.

It’s worth trying this for Neo Geo, Arcade, MAME, and Final Burn Alpha as I found that many of these arcade game’s didn’t work for me first time.
RetroPie Tips & Tricks

8. Web Scraping 'Game Covers'/'Box Art' In RetroPie

Web scraping for box art is the process of using an automated script/tool to search the internet or a particular website and find the correct images for your game ROM’s. 


The default website and the one I would recommend is TheGamesDB. 


What I would say here is make sure you have all of your ROM’s ready to be scraped!


This may seem obvious but there were so many time that I had spent hours scraping covers, only to move ROM’s around and then I would have to scrape all over again!

game ROM
game ROM
game ROM
game ROM
game ROM

The reason for this is:

a) I re-ordered my ROM’s in to categories (folders) of Japan games and English language games.

b) Many of my ROM’s were not named in an agreed standard format. There are a few standards that ROM’s can be in and the one that come’s to mind first is No-Intro.


These standards were created as to be recognised by automation tools.


The naming convention would have the country region in brackets, such as: “(USA)” and languages such as: “(En,Es,De)”.


So after renaming your whole ROM collection.. :/ or re-downloading a more conventionally named ROM collection (which is what I done and I would recommend).

RetroPie Tips & Tricks

A Gottcha!

When web scraping the site ‘TheGamesDB’ for a few hours, you may notice that no more covers are being found.

You will most likely be checking through your collection, checking your internet connection and trying a whole lot of other things and wonder why on earth the scraper doesn’t seem to be working any more?!

 
Well, I found the answer after a long Googling session. The website will only allow X amount of box art scrapes per IP address (Around 1500 I believe) for X amount of time (I estimated this to be around a few days.)
 
 
I didn’t have time to wait every few days to scrape a thousand covers on and off, so what I done was I used my VPN connection to switch servers, thus giving me a new IP address every time.
 
So once my scrape limit had been reached, I simply changed servers.


I understand that this isn’t fair on others who are also web scraping the site but I only needed around 7-8000 covers and I was done for the whole project.
 
If you’re unfamiliar with VPN’s then check out my post on Private Internet Access and how VPN’s work.
RetroPie Tips & Tricks

9. Fixing Performance Issues With RetroPie

Chosen Theme & VRAM

I mentioned at the beginning of this post that I used a Raspberry Pi model 3B.


I did stumble upon some major problems in the early day’s of my RetroPie setup and if I hadn’t have been able to fix those problems then I most likely would have not continued on with the project.


The main problem was that scrolling through the emulators in the front-end (Emulation Station) was very slow and it needed several seconds to load art work. This could be seen as white boxes on the screen.

RetroPie Tips & Tricks

Through some research I found out that this could be caused by a theme that’s heavy on memory and that the issue only lies in the front-end with no problems during the games them selves.


I was using the theme “Back2Basics”. What I needed to do was change the VRAM settings.

This was trial and error for me to find that ‘sweet spot’ and eventually I settled for 370 as the system was now working flawlessly at this point! 🙂


You can change the VRAM settings in Emulation Station by bringing up the Main Menu (Usually by pressing the ‘Start’ button), navigate to ‘Other Settings’ and you will find ‘VRAM Limit’.

Limit Menu Entries

Another performance limitation that I came across was the amount of menu items in Emulation Station.

I discovered that at 25 entries, the system just crashed onto it’s knees. At 24 it was still a little shakey, and so I finally settled for 23.

retropie menu
Highlighting Menu Items In Emulation Station

10. Tips & Tricks With Shaders

With our shiny new HD TV’s at home, looking back at most of the graphics on these retro games will look very blocky because of the higher resolution.


I know that when I first started playing games on the RetroPie I thought to myself “Wow I don’t remember the graphics being this terrible!”


That’s because they were not this bad back then!


Most (if not all) of the games that were not hand-held based were designed for a CRT (Cathode Ray Tube) glass monitor/TV and so these older displays blurred the graphics of the games.


In order to re-create that look and to blur the images a little we use shaders.


It’s up to you, the individual on which shader to apply to a certain emulator as it’s all personal preference.


There are many shaders to choose from and I would encourage you to experiment and see what suits you best.


Saying that, I will give you my personal preferences of what I thought worked best.


RetroPie tips & tricks

For CRT based games such as Arcades, Sega MasterSystem, SNES etc I used the “crt-pi” shader as this gave the lined effect of a glass CRT screen.


As for hand-held gaming console emulators such as the GameBoy Advance I was swaying between many.


The shader named “lcd3x.glsl” would give the graphics small squares and the image looked a little more rounded.


However, I would need to sit far back from the TV to make it possible to play.


The other shaders I like is called “super-eagle.glsl” and “hq4x.glsl”.


Non of these were perfect, but I guess these games were designed for screen sizes of a few inches, not 40-52 inch!

RetroPie Tips & Tricks

How To Change Shaders In RetroPie

Config Menu

To change an emulators system-wide shader settings and have these changes set every time you start a game for that particular emulator, navigate to RetroPie’s config menu and select “retropie setup”.


Once the dialog box appears with the blue background, navigate to: Configuration / tools > Configedit > Configure basic libretro emulator options > then select your chosen emulator.


Make sure “Video Shader Enable” is set to “true”, then select your chosen “Video Shader File”.

RetroPie tips & tricks

RetroArch Menu (in-game menu)

If you just want to test out different shaders without making any permanent changes then you can do this in the RetroArch menu.


The RetroArch menu is accessed during a game.


The buttons to press will depend on how you mapped your controller buttons, but for me I press the hot key and triangle on a PS3 controller.


Once in the menu, near the bottom of “Quick Menu” you can navigate to “shaders”, select “shader #0” > shaders, then select your chosen shader.

RetroPie tips & tricks

11. The RetroPie Bezel Project

Because most of the games and gaming systems that we will be playing were released long before any widescreen TV’s were created and flooded our homes, the screen aspect ratio means that there will be black, empty borders on the left and right side of our screens.

The Bezel Project is a Github project for the RetroPie and once installed, it will create game art to fill in this black area and is an amazing final touch to the RetroPie and highly worth checking out and implementing.


It’s not difficult to get setup and you won’t be disappointed with the results.


The Bezel Project can be found here and a screenshot can be seen in the image below.

12. Run Command Splash Screens

When ever you start up a game ROM you may notice a very ugly looking screen about pressing a button for config options.


It’s possible to add a different splash screen image of your liking to each emulator you have on the system.


All you need to do is find a picture that you want to show up and call the file name either “launching.png” or “launching.jpg”. 

MAME run command splash image
Custom Run Command Splash Image

Next you will need to move/copy this image file over to the path: 

“/opt/retropie/configs/SYSTEM_NAME/” 


where SYSTEM_NAME would be the emulator you want that image to show up, when you begin to run a ROM.


There’s some really cool images made by fans that have been created specifically for this purpose but use your imagination here and see what you come up with.


Fore example: You could have an image of the SEGA logo show up for a few seconds when ever you start up a SEGA Mastersystem ROM.

RetroPie tips & tricks

13. Finishing up (Optional Extra Tips & Tricks)

If you’re gonna let the kids play on your RetroPie (This includes your friends, your parents, spouse, relatives, cat and dog) then it’s probably a good idea to lock things down as to avoid any unwanted changes to the system.

CHANGE THE DEFAULT PASSWORD FOR USER : PI

This one should certainly be done and I wouldn’t consider this to be an option but it needs to be said (can you tell by the uppercase heading?!).


Get into a terminal and enter the following command:

passwd 

You will be prompted for your old password and to enter a new password twice. The default password for the default user of pi is: raspberry.

RetroPie tips & tricks

Disabling internet access

After spending so much time on your pie and getting everything working perfectly, the last thing you want to happen is any software updates.


The emulators alone are usually in heavy development and so any software upgrades could potentially break things. 


Before I came up with a solution, my first step was to remove my wifi settings from the configuration menu in the front-end (emulation station).


My solution was to bring down the ethernet and wireless adapters during the boot process.


All I did was added the following two lines:

ifconfig wlan0 down

ifconfig eth0 down


to the file:

/opt/retropie/configs/all/autostart.sh


before the line:

emulationstation #auto

Then I tested this by rebooting the system.

When emulation station loaded up again I pressed F4 on the attached keyboard to bring up a console.

Then type the following on the command line:

ifconfig 

If eth0 and wlan0 are not shown in ifconfig output then it looks good.

No internet access available. You could always try to ping an online server if you’re REALLY paranoid, with the following command:

ping www.google.com 

And use: Ctrl+Z to stop the command.

RetroPie Tips & Tricks

Place RetroPie into Kiosk Mode

Another, very recommended setting is to place the system into Kiosk mode. 

This should stop any unwanted changes to system settings by anyone who shouldn’t making those changes.

It’s very easy to switch to the “Full” mode again for anyone who knows the button combination.

Instructions for your end-users

If you’re going to be supplying others with your newly created RetroPie then your users are going to need some instructions.

Download my template document here if needed.

To create your QR codes I can recommend the-qrcode-generator.com

Add some killer background music To RetroPie

Check out my other post on how to add your very own background music with multiple features here.

RetroPie Tips & Tricks

Final Thoughts On The RetroPie

I’m a BIG Sega fan and it’s disappointing that the Dreamcast emulator isn’t up to scratch just yet and that the Saturn cannot be emulated on the Raspberry Pi due to hardware requirements.


I would like to build a “Retropie 2” in the future with the addition of Playstation 2, PSP, GameCube and many more emulators but I highly doubt it will be on a Raspberry Pi and it would be a costly build (but looking forward to it!).


The team of RetroPie, Emulation Station, RetroArch and everyone involved have made an amazing achievement here and I would like to take the time to thank them all for their work. Thank you.


RetroPie Tips & Tricks

Conclusion

Have you made it this far..?


Hopefully I’ve given you some great RetroPie tips & tricks to try out yourself.


Some of the tasks that I mention here had taken me hours and even days to figure out and so I’m hoping that you won’t have to endure the same agony as me.

I couldn’t possibly mention every tiny detail about the whole build but I’m pretty sure that I’ve covered the most important aspects here.


Good luck with your build.

New To Linux?

In this site I will focus on creating some linux tutorials for beginner’s!


These won’t be just some random posts though. I will be covering the Linux Professional Institute 1 (LPIC1) certification!


 A world wide recognised certification that covers all the basics of Linux Administration!


Ideal for retropie/raspberry pi users.


installtekz icon

Quote Of The Day

installtekz

"When wireless is perfectly applied, the whole earth will be converted into a huge brain..." - Nikola Tesla, 1926

How useful was this post?

Click on a star to rate it!

Average rating 5 / 5. Vote count: 2

No votes so far! Be the first to rate this post.

Leave a Reply

Your email address will not be published.