So you finally have your RetroPie setup and working. That’s great! but then you realize that things are just a little.. too quiet?!
Let’s add some killer background music to this little rig.
Here I will guide you through the process to add music to Retropie.
This post assumes one thing.. that your RetroPie is running on a Raspberry Pi.
Once you download and run the script by following the 5 commands you will not only add background music with the ability to turn it on and off from the config menu, but I added some extra functionality too.
We can also select an option to:
- start playing the music automatically when the Pi boots up, or not
- we can continue to play the music over the top of games
- and we can also hide some of the more, shall we say less appropriate music for when the kids get a chance to experience this excellent little gaming box (GTA “Joyride” by Da Shootaz anyone? ;).
With all these settings available to us, we’re gonna need a way to see what’s been switched on or off!
For this I created an “info” script, that when executed from Emulation Station front-end config menu, will display what our current state is with our music options.
Are you ready? ..Let’s do this!


Thank you for adding the undo changes option. My Emulation Station would no longer launch after I ran this script. And even though the script warned me, I didn’t do a backup before running it. (I had a backup, but it was a bunch of revisions ago) I thought I was hosed but running your undo option got it back up and running. I’ve since read in the comments above that Pi4 has some issues, I’ll leave it alone for now. First, time to go do a backup. 😉
Thanks again,
Geoff
I just installed this on a 4GB Raspbery Pi 4 powering a PiCade setup on RetroPie Buster 4.7.16. THANK YOU! It worked flawlessly. My setup is on a Kingston 128GB SD card and I am not using a USB drive if anyone wants to use this for a comparison.
Hi
I can’t seem to access the menu to change the menu entries.
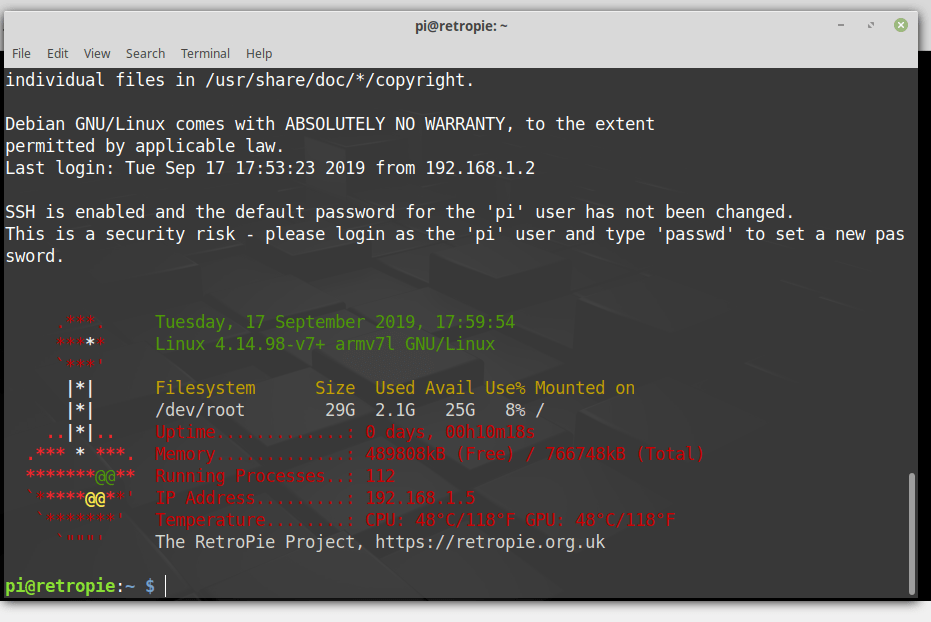
When I type “./setup.sh” in terminal, it says: ‘No such file or directory.’
Any idea how I can access this another way, or what I’m doing wrong?
Thanks in advance!
The file (setup.sh) is not in your path (standard linux). You can use “cd” to change directories and “ls” to look for for it. Or you can download, uncompress and run the file again by following all 5 commands again from this blog post.
Hi
This works great! Thnx!
But can i still access the retropie config menu?
It has been replaced bij your custom music menu.
All other Pie setup/config options are gone.
1: run the script again by typing “./setup.sh”.
2: Select “m” from the menu and press “enter” (“Add/Remove Menu Entries”).
3: Press “y” or “n” then “enter” for each option. (“Show: Audio Settings? ” etc.)
4: Exit the script by pressing “q” from the menu.
5: Check that it has worked. (may need a reboot)
Hi, I Think i was using this with my pi 3, but with 4 it seems to crash or lose gamepad and most of the menu items disappeared from the emulationstation setup after installation. Is there an easy way to unistall this?
reinstalling emulationstation did not work.
Thanks for the feedback. I don’t currently have a Raspberry Pi 4 and so I can’t look into this as of yet. Yes I created the script with an option to “uninstall” by restoring as much as possible back the way it was, but this has only been tested on a Raspberry Pi 3 . You can do this by selecting “Undo All Changes” from the scripts menu.
There is also an option in the menu to “show/hide” these menu options.
If anyone else has any comment on this then it would be appreciated.
Same problem, When I start Retropie I get this error just before Emulation start: “Failed to start dphys-swapfile – setup mount/unmount and delete a swap file retropie” I can’t add new games, save or do anything else since I installed this script, it all stays as it was when I installed it. I also have a Pi 4 … I don’t know if all this information helps, but I hope we have a solution to this error soon 🙁
I think I understand this problem. If you use a USB drive for storing all of your games etc. then you need to have it plugged in before you run the script. This is because Retropie uses TWO possible “places” to store the mount folder (on USB or on SD Card) and it can’t use both at the same time.
It’s been a while since I done this but what I think happens is when Retropie boots up, it looks for the “RetroPie” folder on SD Card first to load up your settings. If the system doesn’t find this folder on the SD card it then looks for it on the USB drive.
You can try re-naming the ‘mount’ folder to see if the system detects the other ‘mount’ folder.
1. go to the command line (F4)
2. Run the command: sudo mv /home/pi/RetroPie /home/pi/RetroPie-backup
3. reboot
4a. If this has not fixed the problem then change the folder name back: sudo mv /home/pi/RetroPie-backup /home/pi/RetroPie
4b. reboot
If the system still detects 2 swapfiles then you may need to find and delete it in the RetroPie folder or delete the folder all together rather than renaming it to RetroPie-backup. However there’s a risk you may loose data!!
Where do we put the music files?
I have added a section above that explains where to place your music files now
Hi,
I just installed this on my retropie setup running on a ubuntu 20.04 machine, everything installed correctly, but inside of retropie (emulstation) there is no music.
I’m guessing that your Ubuntu machine is not a Raspberry Pi?
Hey. I can’t find the music folder from the \\retropie on my PC…I would like to delete the test music and add my own…what am I doing wrong?
Thanks!
M.
I am guessing that you are not using an external USB device for storing your ROMs and you are keeping all files on the SD card? Try copying your mp3 files onto a USB device, plug the USB device in to the retropie, then copy/move the mp3 files over to the music folders.
I hope this helps. (it’s not easy to explain if you don’t know linux)
The script worked beautifully, thank you!
However, some UX feedback, disabling a bunch of Retropie menu items by default is troublesome. I’m happy you documented it here and gave the -m option, but default, it shouldn’t be taking away options. 🙂
Thanks for the feedback. I will take this onboard if/when I modify the script in the future
Hello, great tutorial.
Is there a way to play the music but have it stop playing once you select an operating system (Arcade, MAME, NES, etc…) so we can hear the game snaps (video/audio preview). Then have it start playing again once we get out of the operating system.
Or is there a way to add a music option (operating system) to Retropie like an operating system but rather than selecting games to play we can select music to listen too?
Thanks again for your knowledge and time.
Regards,
E
Hi thanks for the comment.
This project started to get very complex and so I stopped where I thought would be a good point for this first version.
However, I might review this in the future. At the moment, there isn’t a music track selection feature but I would look into this at a later time.
I’m not sure I fully understand your first question but there is an option to either play the music over the games or to pause the music while the game plays. Just select the setting “Continue Music Over Games” ON/OFF
Hope this helps
Thank You for this. As a complete novice there where a few things that were a challenge but this was exactly what I was looking for. Once I gained a little knowledge I was able to get it all work just fine. Now onto volume controls.